
Personalized Introduction
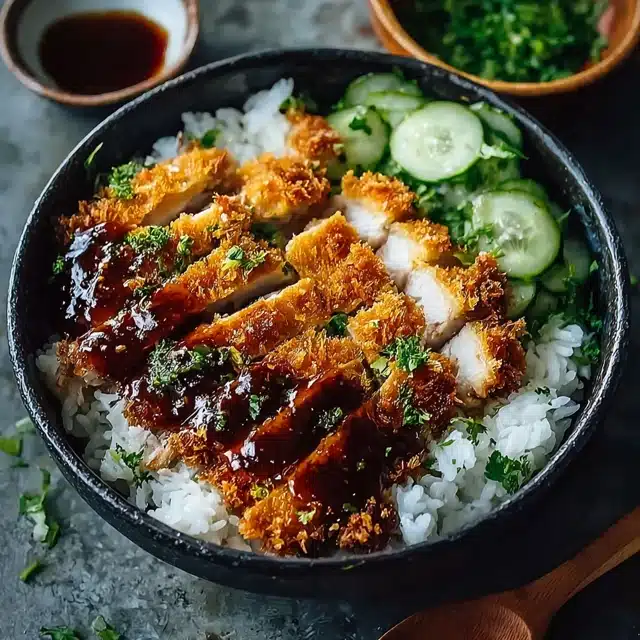
Have you ever taken a bite of something so crispy, savory, and comforting that you instantly want to make it again the next day? That’s exactly how I felt the first time I tried a Japanese katsu bowl. The crunchy breaded chicken, the fluffy rice underneath, and that rich, sweet-savory tonkatsu sauce drizzled on top—honestly, it felt like pure comfort in a bowl.
I remember the first time I made this recipe at home. I was craving something crispy but also filling, and I didn’t want to order takeout. So I decided to try making chicken katsu myself. To my surprise, it was much easier than I expected. When I sliced that golden crispy chicken and placed it over warm rice with sauce and veggies, it looked like something straight out of a Japanese restaurant.
Since then, katsu bowls have become one of my favorite meals to cook when I want something satisfying but still simple. If you enjoy crispy chicken, flavorful sauces, and cozy rice bowls, I think you’re going to love this recipe as much as I do.
Recipe Origin & Story
The word “katsu” comes from the Japanese word katsuretsu, which means cutlet. The dish was inspired by European breaded cutlets but was adapted in Japan in the late 19th century during the Meiji era. Over time, Japanese chefs created their own version using panko breadcrumbs, which are lighter and crispier than traditional breadcrumbs.
Traditionally, tonkatsu is made with pork cutlets, but chicken katsu became very popular as well. Today, you can find katsu served in many ways—on rice bowls, inside sandwiches, or even with Japanese curry.
For me, the katsu bowl is the ultimate comfort meal. I love how simple ingredients—rice, chicken, sauce, and vegetables—come together into something that feels both special and satisfying. It reminds me that good food doesn’t have to be complicated.
Ingredient Spotlight
- Main Star: The real hero here is the crispy chicken katsu. Chicken breast or thigh is coated in panko breadcrumbs and fried until golden and crunchy. Panko is what gives katsu its signature airy crunch.
- Secret Boost: Tonkatsu sauce is the magic ingredient that brings everything together. It’s a thick, sweet, tangy sauce similar to barbecue sauce but with a deeper umami flavor.
- Quality Tips: Use Japanese panko breadcrumbs if possible. They create a lighter, crispier crust than regular breadcrumbs. Also, choose fresh chicken and high-quality soy sauce for the best flavor.
Nutritional Benefits
While katsu bowls are known for their crispy goodness, they also offer some nice nutritional benefits when balanced with fresh ingredients.
First, chicken provides a strong source of protein, which helps keep you full and supports muscle health.
Second, rice supplies carbohydrates that give your body energy throughout the day.
Finally, adding fresh vegetables like cabbage, carrots, or cucumbers increases fiber and vitamins, making the bowl more balanced and nutritious.
Adaptable Variations
-
Dietary Swaps:
For a gluten-free version, use gluten-free panko and tamari instead of soy sauce. You can also bake or air fry the chicken instead of deep frying for a lighter option. -
Flavor Twists:
Try adding sesame seeds, pickled ginger, green onions, or even a soft-boiled egg on top of your bowl. -
Seasonal Spins:
In summer, add crunchy cucumber and fresh herbs. In colder months, pair the katsu with warm miso soup and sautéed vegetables.
Cooking Science Explained
There’s a little kitchen science behind that perfectly crispy katsu.
First, coating the chicken in flour, egg, and panko helps the breadcrumbs stick properly and creates layers that fry into a crunchy crust.
Second, frying at the right temperature (around 350°F or 175°C) ensures the chicken cooks evenly while the crust turns golden instead of greasy.
Finally, letting the fried chicken rest on a rack for a minute keeps it crispy. If you place it directly on a plate, steam can soften the crust.
Easy, Step-by-Step Recipe
Ingredients
- 2 chicken breasts (or 4 small cutlets)
- 1 cup panko breadcrumbs
- 1/2 cup all-purpose flour
- 2 eggs, beaten
- 1/2 teaspoon salt
- 1/2 teaspoon black pepper
- 1/2 teaspoon garlic powder (optional)
- 2 cups cooked white rice
- 1 cup shredded cabbage
- 1 carrot, julienned
- Vegetable oil for frying
For the Tonkatsu Sauce
- 3 tablespoons ketchup
- 2 tablespoons Worcestershire sauce
- 1 tablespoon soy sauce
- 1 tablespoon sugar
- 1 teaspoon Dijon mustard
Instructions
- Prepare the chicken by gently pounding the chicken breasts to an even thickness. Season both sides with salt and pepper.
- Set up three bowls: one with flour, one with beaten eggs, and one with panko breadcrumbs.
- Coat the chicken first in flour, then dip it into the egg mixture, and finally coat it with panko breadcrumbs. Press gently so the crumbs stick well.
- Heat about 1 inch of vegetable oil in a frying pan over medium heat. Fry the chicken for about 4–5 minutes per side until golden brown and cooked through.
- Transfer the chicken to a rack or paper towel and let it rest for a minute before slicing.
- In a small bowl, mix all the tonkatsu sauce ingredients until smooth.
- To assemble the bowls, place warm rice in a bowl, add shredded cabbage and carrots, then place sliced chicken katsu on top.
- Drizzle generously with tonkatsu sauce and garnish with green onions or sesame seeds.
Practical & Valuable Tips
- Storage: Store leftover chicken separately in the refrigerator for up to 3 days to keep the crust crisp.
- Serving Ideas: Serve your katsu bowl with miso soup, pickled vegetables, or steamed edamame.
- Substitutions: If you don’t have panko breadcrumbs, crushed cornflakes can create a similar crispy texture.
Make-Ahead & Batch-Cooking
If you’re planning meals for the week, you can bread the chicken ahead of time and store it in the refrigerator for several hours before frying. You can also cook the rice in advance and reheat it when ready to assemble the bowls.
For reheating leftover katsu, use an oven or air fryer instead of the microwave to keep the crust crispy.
Eco-Friendly Kitchen Hacks
- Reuse frying oil by straining it after cooking and storing it for another batch.
- Use leftover cabbage or vegetables in salads or stir-fries.
- Cook rice in larger batches and store portions for future meals.
Pairing Suggestions
- Beverages: Green tea, iced jasmine tea, or sparkling water with lemon pairs beautifully with katsu bowls.
- Sides & Sauces: Miso soup, seaweed salad, or pickled cucumbers add refreshing contrast to the crispy chicken.
Frequently Asked Questions
-
Can I bake chicken katsu instead of frying?
Yes! Bake it at 400°F (200°C) for about 20–25 minutes. Spray the breadcrumbs lightly with oil to help them crisp. -
What makes panko different from regular breadcrumbs?
Panko breadcrumbs are larger and lighter, creating a crispier texture when fried. -
Can I use pork instead of chicken?
Absolutely. Pork loin cutlets are the traditional choice for tonkatsu. -
How do I keep the chicken crispy?
Place fried chicken on a rack instead of stacking it on a plate so air can circulate around it.
Call to Action
Now it’s your turn to bring this crispy, saucy Japanese comfort food into your own kitchen. Once you taste that crunchy chicken with sweet and tangy tonkatsu sauce over warm rice, you might find yourself making it again and again.
If you try this recipe, share your experience! Did you add your own toppings or twist? Cooking is always more fun when we share ideas and inspire each other.
Bonus: Your Kitchen Notes
Feel free to add your own notes or tweaks to this recipe. Maybe you tried air frying the chicken, added spicy mayo, or used brown rice instead of white rice.
Every kitchen adventure makes a recipe a little more personal—and that’s what cooking is really about.