
Personalized Introduction
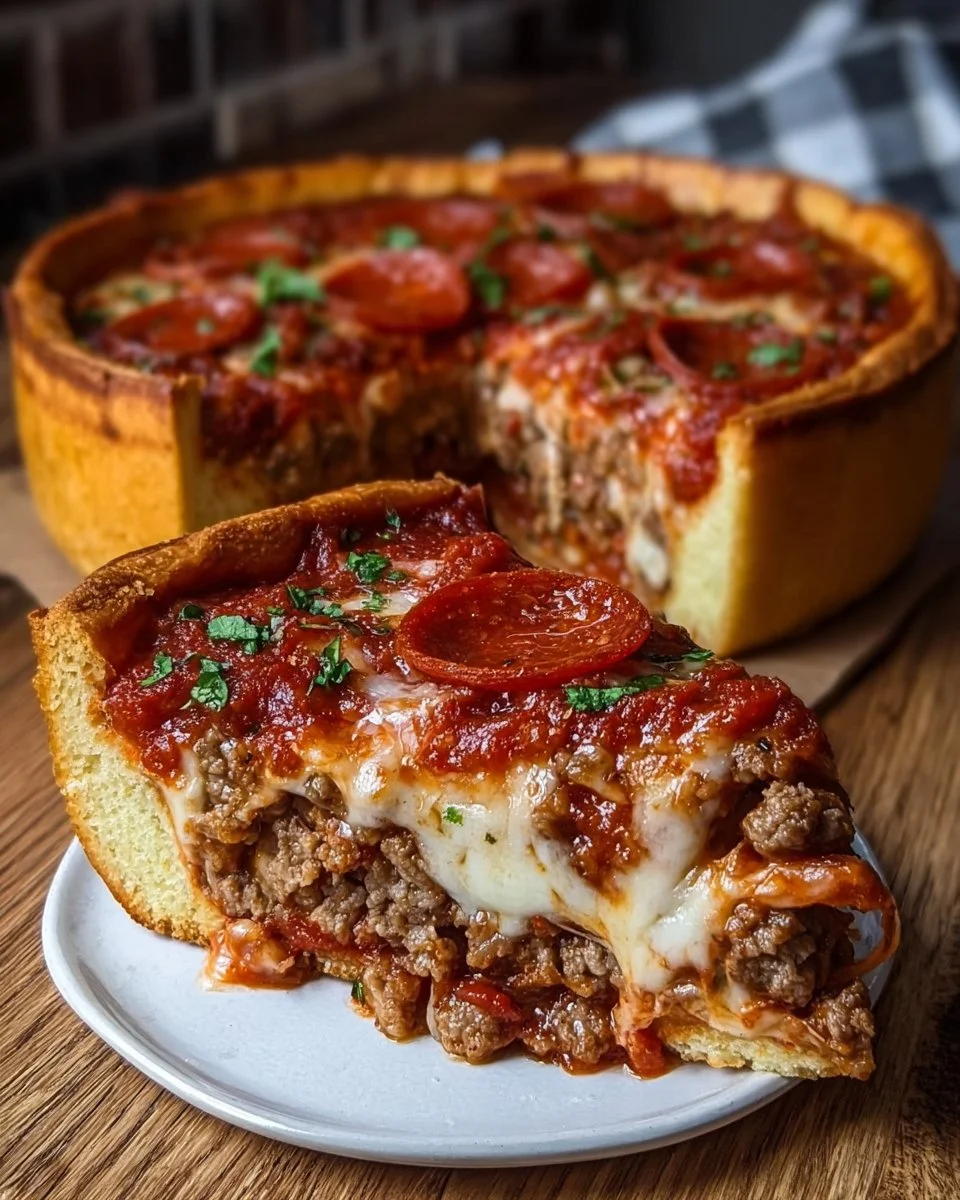
Have you ever craved a pizza that’s more than just a quick bite—something thick, cheesy, rich, and truly satisfying? That’s exactly how I felt the first time I made a Chicago-style deep dish pizza at home.
I remember thinking it would be too complicated. I mean, this isn’t your usual thin crust pizza. It’s layered, bold, and almost like a pie. But once I tried it, I realized it’s actually a fun and rewarding experience—and the result is absolutely worth it.
This is the kind of recipe you make when you want to slow down, enjoy the process, and create something unforgettable. And trust me, when you slice into that thick crust filled with melted cheese and rich tomato sauce, you’ll feel like a pizza chef in your own kitchen.
Recipe Origin & Story
Chicago-style deep dish pizza was created in Chicago in the 1940s and quickly became one of the city’s most famous foods. Unlike traditional pizzas, this version is baked in a deep pan, giving it a thick crust and layered filling.
What makes it unique is the order of ingredients—cheese goes first, then toppings, and finally the sauce on top. This keeps the cheese from burning during the longer baking time.
For me, making this pizza at home felt like bringing a piece of Chicago into my kitchen. The first time I served it, everyone was surprised by how different—and delicious—it was compared to regular pizza.
Ingredient Spotlight
- Main Star: The crust is what defines this pizza. It’s thick, buttery, and slightly crisp on the outside while soft inside.
- Secret Boost: A generous layer of mozzarella cheese placed directly on the dough creates that signature gooey texture.
-
Quality Tips:
Use low-moisture mozzarella to avoid a watery pizza. For the sauce, choose crushed tomatoes with good flavor. And don’t skip olive oil in the dough—it adds richness.
Nutritional Benefits
This pizza is definitely a comfort food, but it still offers some nutritional value.
Cheese provides calcium and protein, which support bones and muscles.
Tomato sauce is rich in antioxidants like lycopene, which is good for heart health.
If you add vegetables like peppers or spinach, you also increase fiber and vitamins.
Adaptable Variations
-
Dietary Swaps:
Use whole wheat flour for the dough for added fiber. You can also use dairy-free cheese for a vegan version. -
Flavor Twists:
Add sausage, pepperoni, mushrooms, or olives for extra flavor. A sprinkle of chili flakes adds a nice kick. -
Seasonal Spins:
In summer, use fresh tomatoes and basil. In winter, go for hearty toppings like sausage and caramelized onions.
Cooking Science Explained
Let’s talk about what makes this pizza work so well.
First, the thick dough needs time to bake fully, which is why the sauce goes on top—to protect the cheese from burning.
Second, baking in a deep pan allows heat to cook the crust evenly from all sides.
Finally, letting the pizza rest after baking helps the layers set, making it easier to slice without falling apart.
Easy, Step-by-Step Recipe
Ingredients
- 2 1/2 cups all-purpose flour
- 1 teaspoon salt
- 1 teaspoon sugar
- 2 1/4 teaspoons yeast (1 packet)
- 1 cup warm water
- 3 tablespoons olive oil
- 2 tablespoons butter (melted)
- 2 cups shredded mozzarella cheese
- 1/2 cup grated Parmesan cheese
- 1 cup cooked sausage or toppings of choice
- 1 1/2 cups crushed tomatoes
- 1 teaspoon Italian seasoning
- 1/2 teaspoon garlic powder
Instructions
- In a bowl, mix warm water, yeast, and sugar. Let it sit for 5–10 minutes until foamy.
- Add flour, salt, olive oil, and melted butter. Mix and knead until a smooth dough forms.
- Cover the dough and let it rise for about 1 hour until doubled in size.
- Preheat your oven to 200°C (400°F). Grease a deep baking pan.
- Press the dough into the pan, making sure it goes up the sides.
- Add mozzarella cheese directly on the dough, then add sausage or toppings.
- Pour crushed tomatoes on top and sprinkle with seasoning and Parmesan.
- Bake for 25–30 minutes until the crust is golden and the filling is bubbling.
- Let the pizza rest for 10 minutes before slicing and serving.
Practical & Valuable Tips
- Storage: Store leftovers in the fridge for up to 3 days and reheat in the oven.
- Serving Ideas: Serve with a fresh salad or garlic bread.
- Substitutions: You can use store-bought dough if you’re short on time.
Make-Ahead & Batch-Cooking
You can prepare the dough ahead of time and store it in the fridge overnight. This actually improves the flavor.
You can also assemble the pizza in advance and bake it when ready to serve.
Eco-Friendly Kitchen Hacks
- Use leftover vegetables as toppings to reduce waste.
- Make extra dough and freeze it for future meals.
- Use reusable containers for storing leftovers.
Pairing Suggestions
- Beverages: Sparkling water, soda, or iced tea complement the rich flavors.
- Sides & Sauces: A simple green salad or roasted vegetables balance the meal.
Frequently Asked Questions
-
Why is the sauce on top?
It protects the cheese from burning during the longer baking time. -
Can I use a regular pan?
Yes, but a deep pan gives the best results. -
How do I avoid a soggy crust?
Use low-moisture cheese and don’t overload with sauce. -
Can I freeze it?
Yes, you can freeze baked slices and reheat later.
Call to Action
Now it’s your turn to try this homemade Chicago-style deep dish pizza. It’s fun, delicious, and perfect for sharing.
If you make it, tell me your favorite toppings and how it turned out. I’d love to hear your version of this classic dish!
Bonus: Your Kitchen Notes
Use this section to write your own variations—maybe a different sauce, new toppings, or a special twist.
Cooking is all about creativity, and every pizza you make tells your own story.