
Personalized Introduction
Have you ever had that craving where nothing but takeout will do… but then you open the menu, look at the prices, and suddenly think, “Maybe I can just make this at home”? That’s exactly how I started making sesame chicken.
The first time I tried it at home, I was honestly nervous. I thought crispy chicken would be complicated, messy, and maybe even disappointing. But the moment I heard that first sizzle in the oil and saw the chicken turn golden and crunchy, I knew I was onto something special.
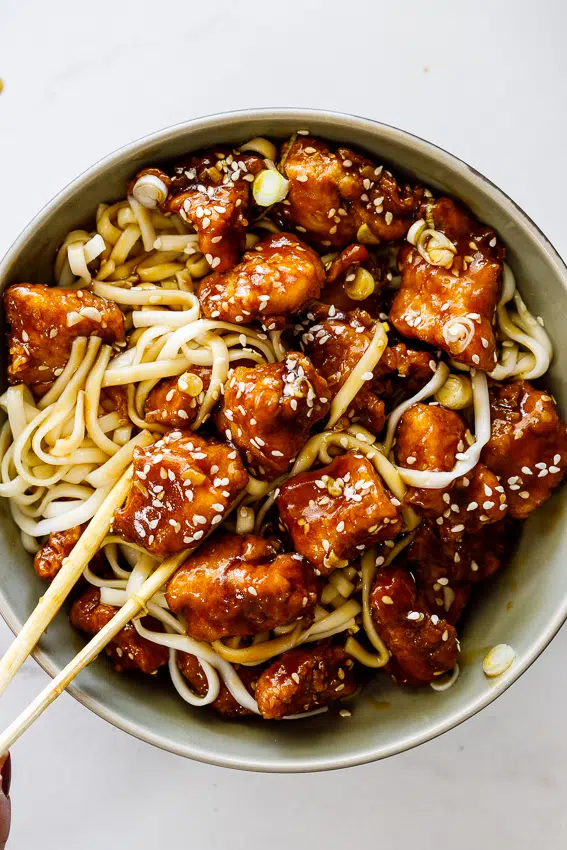
Then came the sauce—the sticky, glossy, sweet-and-savory sesame glaze that coats every bite perfectly. I remember tasting it straight from the pan and thinking, “Okay… this is officially better than takeout.” And I don’t say that lightly.
Now this recipe is one of my favorite weeknight dinners. It’s fast, satisfying, and feels like a treat without needing delivery. Today I’m sharing it with you like we’re cooking side by side in my kitchen, chatting while the oil heats up and the sauce simmers.
Recipe Origin & Story
Sesame chicken is inspired by Chinese-American cuisine, especially popular in takeout restaurants across the United States and beyond. While it’s not a traditional Chinese dish, it has become a beloved comfort food for millions of people.
The combination of crispy fried chicken and sweet, sticky sesame sauce is what makes it so addictive. It’s similar in spirit to dishes like General Tso’s chicken or orange chicken, where bold flavors meet crunchy texture.
For me, this dish became a homemade favorite during a time when I was trying to recreate my favorite takeout meals. I didn’t expect much at first, but after a few experiments with cornstarch coating and sauce balance, I finally landed on a version that felt perfect—crispy outside, juicy inside, and coated in a sauce that actually sticks to the chicken instead of sliding off.
Ingredient Spotlight
- Main Star: Chicken breast (or thighs) — The foundation of this dish. When coated properly with cornstarch and fried, it becomes incredibly crispy on the outside while staying juicy inside.
- Secret Boost: Sesame oil and honey — sesame oil gives that deep nutty aroma, while honey helps create that glossy, sticky sauce that clings beautifully to every piece of chicken.
- Quality Tips: Choose fresh chicken that is firm and pink. Use pure sesame oil (not blended) for stronger flavor. Fresh garlic and ginger also make a huge difference compared to powdered versions.
Nutritional Benefits
While sesame chicken is definitely a comfort food, it still offers some nutritional value when made at home with balanced ingredients.
First, chicken provides high-quality protein, which helps build and repair muscles and keeps you feeling full longer.
Second, sesame seeds contain healthy fats, calcium, and antioxidants that support bone and heart health.
Finally, garlic and ginger—two key ingredients in the sauce—are known for their anti-inflammatory and immune-boosting properties.
Adaptable Variations
- Dietary Swaps: You can bake or air-fry the chicken instead of deep frying for a lighter version. For gluten-free, use tamari instead of soy sauce and gluten-free cornstarch.
- Flavor Twists: Add chili flakes or sriracha for a spicy kick, or orange zest for a citrusy twist. You can also toss in steamed broccoli or bell peppers for extra texture.
- Seasonal Spins: In summer, add fresh green onions and light sesame drizzle. In winter, make the sauce slightly richer and thicker for extra comfort. In spring, add snap peas for freshness.
Cooking Science Explained
There’s a reason sesame chicken gets so crispy and sticky at the same time—it’s all about technique.
First, coating the chicken in cornstarch creates a dry outer layer. When fried, this layer turns into a crisp shell that locks in moisture.
Second, frying at the right temperature (around 350°F / 175°C) ensures the chicken cooks quickly without absorbing too much oil. Too low, and it becomes greasy; too high, and it burns outside before cooking inside.
Third, the sauce thickens thanks to the combination of honey, soy sauce, and a small starch slurry. This creates that glossy texture that clings to every bite instead of pooling at the bottom of the pan.
Easy, Step-by-Step Recipe
Ingredients
- 500 g chicken breast or thighs, cut into bite-sized pieces
- 1 cup cornstarch (for coating)
- 2 eggs, beaten
- 1/2 teaspoon salt
- 1/2 teaspoon black pepper
- Oil for frying
- For the Sauce:
- 1/3 cup soy sauce
- 1/3 cup honey
- 2 tablespoons brown sugar
- 2 tablespoons rice vinegar
- 1 tablespoon sesame oil
- 3 cloves garlic, minced
- 1 teaspoon grated ginger
- 1 tablespoon cornstarch mixed with 2 tablespoons water (slurry)
- For Garnish:
- 1 tablespoon sesame seeds
- 2 green onions, sliced
Instructions
- Season chicken with salt and pepper. Dip each piece into beaten eggs, then coat well with cornstarch.
- Heat oil in a deep pan over medium-high heat. Fry chicken in batches until golden and crispy. Remove and drain on paper towels.
- In a separate pan, combine soy sauce, honey, brown sugar, rice vinegar, sesame oil, garlic, and ginger. Heat gently until it starts to bubble.
- Add the cornstarch slurry to the sauce and stir until it thickens into a glossy glaze.
- Add the crispy chicken into the sauce and toss until fully coated.
- Sprinkle sesame seeds and green onions on top. Serve immediately while hot and sticky.
Practical & Valuable Tips
- Storage: Store leftovers in the fridge for up to 2 days. Reheat in an air fryer or oven to maintain crispiness.
- Serving Ideas: Serve with steamed rice, fried rice, or noodles. Add a side of steamed broccoli for balance.
- Substitutions: Chicken can be replaced with tofu, shrimp, or even cauliflower for a vegetarian version.
Make-Ahead & Batch-Cooking
You can prepare the sauce in advance and store it in the fridge for up to 5 days. The chicken can also be coated ahead of time and kept raw in the fridge for a few hours before frying.
For meal prep, I recommend keeping the sauce and chicken separate until serving time to preserve crispiness.
Eco-Friendly Kitchen Hacks
- Reuse frying oil (if clean) for other cooking sessions to reduce waste.
- Use leftover vegetable scraps to make broth for future meals.
- Cook multiple fried items in one batch to save energy.
Pairing Suggestions
- Beverages: Iced green tea, sparkling water, or a light citrus drink balances the sweetness of the dish.
- Sides & Sauces: Steamed jasmine rice, vegetable stir-fry, or egg drop soup pair perfectly with sesame chicken.
Frequently Asked Questions
-
Why isn’t my chicken crispy?
The oil may not be hot enough, or the chicken may be overcrowded in the pan. Fry in small batches. -
Can I bake instead of fry?
Yes! Bake at 200°C (400°F) until golden, then toss in sauce. -
Is sesame chicken very sweet?
It has a sweet balance, but you can reduce honey or sugar to adjust it. -
Can I make it spicy?
Absolutely—add chili flakes, sriracha, or chili paste to the sauce.
Call to Action
Now it’s your turn to bring this crispy sesame chicken into your kitchen. Once you try it homemade, you might find yourself skipping takeout more often than you think.
If you make it, I’d love to hear your version. Did you keep it classic, or did you add spice, veggies, or your own twist? Share it and let’s keep building better-than-takeout recipes together.
Bonus: Your Kitchen Notes
This is your space to personalize the recipe. Maybe you prefer it extra saucy, extra crispy, or less sweet. Write it down so next time you cook it, it’s exactly how you love it.
Because the best recipes are never finished—they evolve with you.