
Personalized Introduction
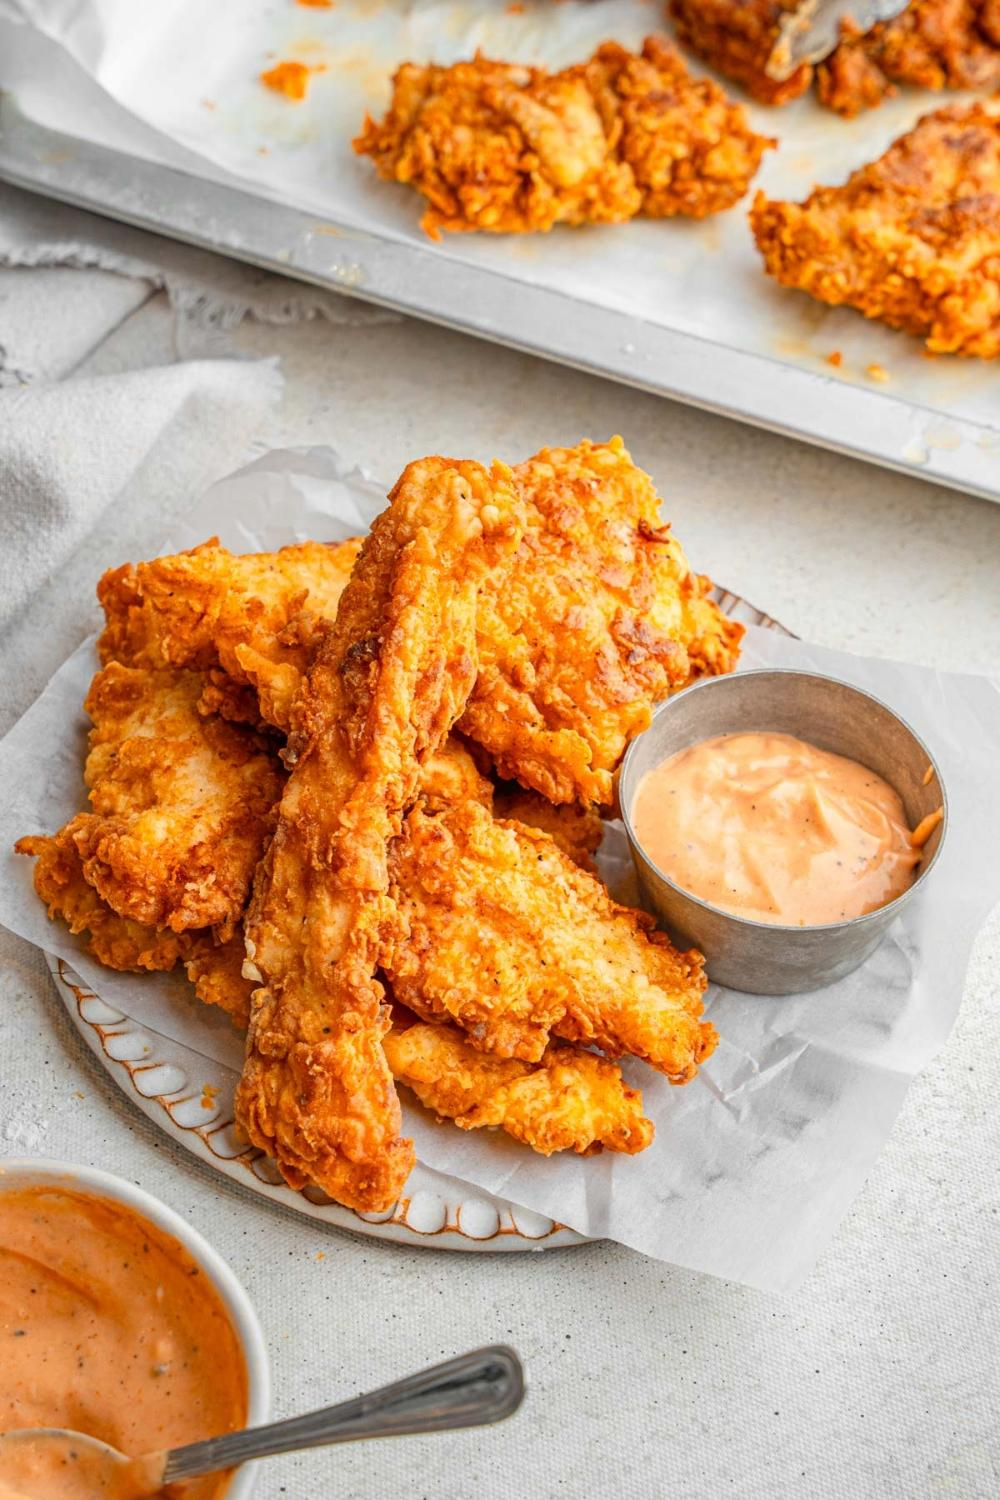
If you’ve ever craved those famous crispy chicken tenders from Raising Cane’s, you’re definitely not alone. There’s something incredibly satisfying about biting into perfectly seasoned, golden-brown chicken with a crunchy coating that gives way to tender, juicy meat inside. Pair it with creamy dipping sauce, buttery Texas toast, and crispy fries, and you’ve got a meal that’s hard to resist.
For me, recreating restaurant favorites at home is one of the most rewarding parts of cooking. Not only does it save money, but it also lets me control the ingredients, adjust the seasonings, and make as much as I want. After plenty of testing in my kitchen, I finally found a combination that captures everything I love about Raising Cane’s-style chicken tenders—the crispy crust, the juicy chicken, and that irresistible homemade Cane’s-inspired sauce.
One of the things I love most about this recipe is that it doesn’t require complicated techniques or hard-to-find ingredients. Everything comes together with simple pantry staples, and the results honestly rival what you’d get from your favorite fast-food restaurant. Whether I’m cooking for family movie night, game day, or a weekend dinner, these chicken tenders disappear almost as quickly as I can fry them.
If you’ve been searching for the ultimate homemade chicken tender recipe, you’re in the right place. Let’s make crispy, golden perfection together!
Recipe Origin & Story
Chicken tenders have been a comfort food favorite for decades, but Raising Cane’s helped make them iconic by focusing almost entirely on one thing—perfectly cooked chicken fingers. Instead of offering a huge menu, the restaurant became famous for serving fresh chicken tenders with crispy fries, buttery Texas toast, creamy coleslaw, and its legendary signature dipping sauce.
Inspired by that simple approach, home cooks everywhere have tried to recreate the same experience in their own kitchens. While the exact restaurant recipe remains a closely guarded secret, many copycat versions have come remarkably close by focusing on proper marinating, double dredging, and careful frying.
The first time I attempted these at home, I was honestly surprised by how close they tasted to the original. My family immediately requested that I make them again, and they’ve since become one of our favorite weekend treats. Now, whenever we’re craving crispy chicken without leaving the house, this recipe is always at the top of the list.
There’s something extra satisfying about serving hot, freshly fried chicken tenders straight from your own kitchen, especially when everyone gathers around the table ready to dip them into that creamy homemade sauce.
Ingredient Spotlight
- Main Star: Fresh chicken tenderloins are naturally tender and cook quickly, making them the perfect choice for juicy homemade chicken tenders.
- Secret Boost: Marinating the chicken in buttermilk is the secret to incredibly juicy meat while also helping the seasoned coating stick beautifully during frying.
- Quality Tips: Use fresh chicken whenever possible, real buttermilk, and good-quality flour. Freshly cracked black pepper and paprika provide richer flavor than older spices sitting in the pantry.
Nutritional Benefits
Although fried chicken is definitely considered comfort food, it still offers some nutritional benefits when enjoyed as part of a balanced diet. Chicken is an excellent source of lean protein, helping support muscle growth and keeping you full longer.
Making these tenders at home also means you control the quality of the ingredients. You can use fresh oil, avoid unnecessary preservatives, and even choose to air fry or bake them for a lighter version.
If you serve these tenders with fresh vegetables, a crisp salad, or homemade coleslaw instead of only fries, you’ll create a more balanced meal that’s both satisfying and delicious.
Adaptable Variations
- Dietary Swaps: Use gluten-free flour and gluten-free breadcrumbs for a gluten-free version. For dairy-free cooking, marinate the chicken in unsweetened dairy-free milk mixed with a little lemon juice instead of buttermilk.
- Flavor Twists: Add cayenne pepper for extra heat, smoked paprika for a deeper smoky flavor, grated Parmesan for richness, or your favorite Cajun seasoning for a Southern-inspired kick.
- Seasonal Spins: Serve with fresh summer salads, autumn roasted vegetables, winter mashed potatoes, or spring asparagus and lemon wedges for seasonal variety.
Cooking Science Explained
The buttermilk marinade gently tenderizes the chicken because its mild acidity helps break down some of the proteins without making the meat mushy. That’s why every bite stays juicy after frying.
Double-coating the chicken creates extra crispy tenders. The first coating sticks directly to the chicken, while the second layer builds those beautiful crunchy ridges that everyone loves.
Keeping the oil between 350°F and 365°F (175–185°C) is essential. If the oil is too cool, the coating absorbs excess oil and becomes greasy. If it’s too hot, the outside browns too quickly before the chicken finishes cooking.
Easy, Step-by-Step Recipe
Ingredients
For the Chicken
- 2 pounds (900 g) chicken tenderloins
- 2 cups buttermilk
- 1 teaspoon salt
- 1 teaspoon black pepper
- 1 teaspoon garlic powder
For the Coating
- 2 cups all-purpose flour
- 1 tablespoon paprika
- 1 teaspoon garlic powder
- 1 teaspoon onion powder
- 1 teaspoon salt
- 1 teaspoon black pepper
- ½ teaspoon cayenne pepper (optional)
For Frying
- Vegetable or peanut oil for deep frying
Homemade Cane’s-Inspired Sauce
- ½ cup mayonnaise
- ¼ cup ketchup
- 1 teaspoon Worcestershire sauce
- ½ teaspoon garlic powder
- ½ teaspoon freshly cracked black pepper
- ½ teaspoon paprika
Instructions
- Place the chicken tenderloins in a large bowl with buttermilk, salt, pepper, and garlic powder. Cover and refrigerate for at least 1 hour, or overnight for the juiciest results.
- In another bowl, whisk together the flour, paprika, garlic powder, onion powder, salt, pepper, and cayenne.
- Remove each chicken tender from the marinade, allowing the excess buttermilk to drip off slightly.
- Coat each piece thoroughly in the seasoned flour mixture.
- For extra crunch, dip the chicken back into the buttermilk, then coat it again with the flour mixture.
- Heat oil in a deep fryer or heavy Dutch oven to 350°F (175°C).
- Carefully fry the chicken in batches for about 5–7 minutes until golden brown and fully cooked to an internal temperature of 165°F (74°C).
- Transfer the cooked tenders to a wire rack instead of paper towels to help keep the coating crispy.
- Meanwhile, mix all of the dipping sauce ingredients together and refrigerate for at least 30 minutes before serving.
- Serve immediately with homemade fries, Texas toast, coleslaw, and plenty of dipping sauce.
Practical & Valuable Tips
- Storage: Refrigerate leftover chicken tenders in an airtight container for up to 4 days.
- Serving Ideas: Serve with French fries, onion rings, mac and cheese, potato wedges, coleslaw, or a fresh garden salad.
- Substitutions: Chicken breasts sliced into strips work perfectly if chicken tenderloins aren’t available.
Make-Ahead & Batch-Cooking
This recipe is fantastic for meal prep. The chicken can marinate overnight, making dinner even easier the next day. You can also coat the chicken a few hours ahead of time and keep it refrigerated until you’re ready to fry.
Cooked tenders freeze surprisingly well. Let them cool completely before placing them in freezer-safe containers or bags. They’ll keep for up to three months. Reheat them in the oven or air fryer instead of the microwave to maintain that delicious crispy coating.
The homemade dipping sauce actually tastes even better after sitting overnight in the refrigerator because the flavors have time to blend together. Making it a day in advance is highly recommended.
Eco-Friendly Kitchen Hacks
- Reuse frying oil by straining it after cooling and storing it properly for future frying.
- Use leftover chicken tenders in wraps, salads, or sandwiches instead of letting them go to waste.
- Compost vegetable scraps from your side dishes whenever possible.
- Cook multiple batches while the oil is hot to reduce overall energy use.
Pairing Suggestions
- Beverages: Fresh lemonade, sweet iced tea, sparkling water, cola, or a creamy vanilla milkshake all pair beautifully with crispy chicken tenders.
- Sides & Sauces: Crispy French fries, buttery Texas toast, creamy coleslaw, fried pickles, macaroni and cheese, honey mustard, ranch dressing, barbecue sauce, or spicy buffalo sauce make excellent companions.
Frequently Asked Questions
-
Can I air fry these chicken tenders?
Yes! Spray both sides lightly with cooking oil and air fry at 400°F (200°C) for about 10–12 minutes, flipping halfway through. -
Can I bake them instead of frying?
Absolutely. Bake on a wire rack over a baking sheet at 425°F (220°C) for 20–25 minutes until crispy and fully cooked. -
Why did my coating fall off?
Make sure the chicken is well coated, avoid overcrowding the fryer, and allow the coating to rest for about 10 minutes before frying. -
Can I make the dipping sauce ahead of time?
Definitely! In fact, the sauce tastes even better after chilling overnight because the seasonings blend together more thoroughly.
Call to Action
There’s nothing quite like serving a basket of crispy homemade chicken tenders fresh from the fryer. They’re crunchy on the outside, juicy on the inside, and paired with that creamy homemade Cane’s-inspired sauce, they’re guaranteed to impress family and friends alike.
If you give this recipe a try, I’d love to hear how it turned out! Leave a comment below with your favorite dipping sauce or side dish, and don’t forget to share your homemade chicken tender masterpiece on social media. Be sure to save this recipe—you’ll definitely want to make it again!
Bonus: Your Kitchen Notes
Every batch of homemade chicken tenders teaches you something new. Maybe you found your perfect seasoning blend, discovered that an overnight marinade made the chicken even juicier, or added a pinch of cayenne for just the right amount of heat. Write down your favorite adjustments here so you can recreate your perfect version every time.
This section is also a great place to note your favorite side dishes, dipping sauces, or cooking times based on your fryer or air fryer. Before long, this recipe will become your own family favorite that’s requested again and again. Happy cooking!