
Personalized Introduction
If you’ve ever wanted to make homemade onigiri but only had regular white rice sitting in your pantry, I’ve got great news—you absolutely can! While traditional Japanese onigiri is usually made with short-grain Japanese rice because of its natural stickiness, I’ve made delicious rice balls many times using ordinary long-grain white rice. The trick is knowing how to cook and handle the rice so it holds together properly.
The first time I tried making onigiri at home, I assumed I needed special ingredients that weren’t easy to find. Then I experimented with the rice I already had at home, and after a few simple adjustments, I ended up with soft, flavorful rice balls that stayed together beautifully. They may not be exactly like the traditional version, but they’re still incredibly tasty and perfect for lunch, meal prep, or a quick snack.
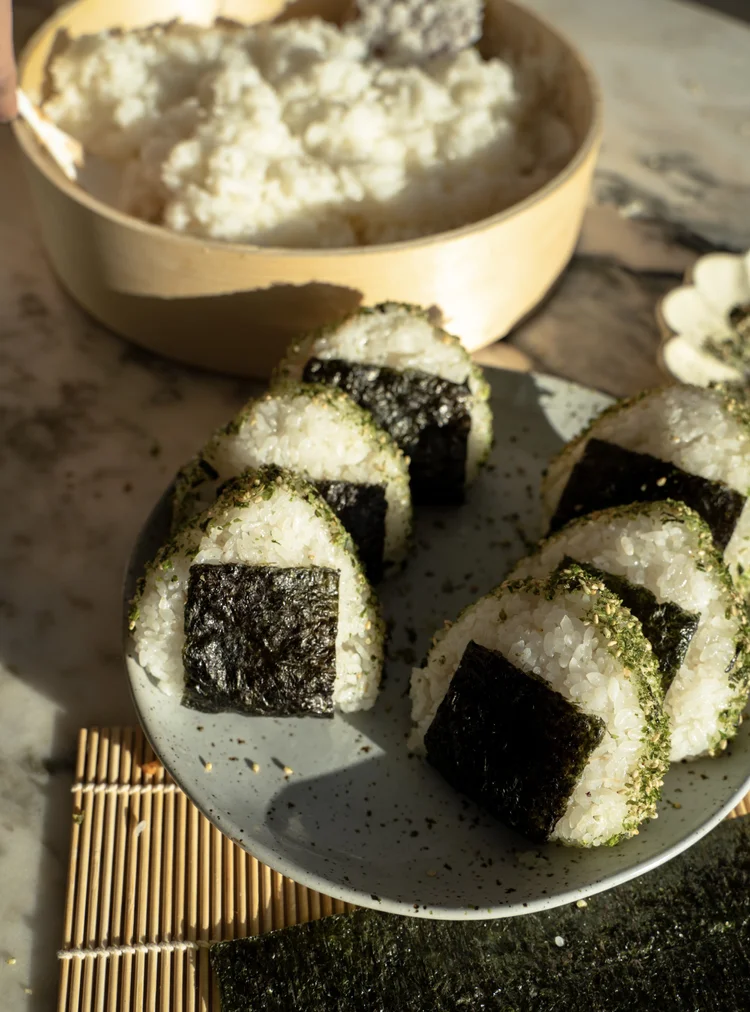
One of the things I love most about onigiri is how customizable it is. You can keep it simple with just salt, fill it with tuna mayo, cooked salmon, or pickled vegetables, or even wrap it with crispy seaweed for an authentic Japanese touch. They’re portable, satisfying, and surprisingly easy to prepare.
Whenever I have leftover rice, this recipe is one of my favorite ways to transform it into something completely different. It takes just a few ingredients and a little patience while shaping the rice, and the results are always worth it.
Whether you’re making lunch for work, preparing snacks for school, or simply exploring Japanese cooking for the first time, these homemade onigiri made with normal rice are a fun and delicious recipe you’ll want to make again and again.
Recipe Origin & Story
Onigiri, often called Japanese rice balls, have been enjoyed in Japan for more than a thousand years. Traditionally, they were prepared as convenient portable meals for travelers, farmers, and soldiers because they were easy to carry and stayed fresh for several hours.
Classic onigiri is usually made with Japanese short-grain rice, which naturally becomes sticky after cooking. This stickiness helps the rice hold its familiar triangle or round shape without falling apart. They’re commonly wrapped in sheets of nori (seaweed) and filled with ingredients such as salted salmon, tuna mayonnaise, pickled plum (umeboshi), or seasoned vegetables.
Outside Japan, many home cooks don’t always have access to Japanese rice, so using ordinary white rice has become a practical alternative. While the texture is slightly different, careful cooking and gentle shaping can still produce delicious homemade rice balls.
The first time I packed homemade onigiri for lunch, I was surprised by how filling and convenient they were. Since then, they’ve become one of my favorite recipes whenever I want something simple, affordable, and satisfying.
Ingredient Spotlight
- Main Star: Regular white rice becomes surprisingly easy to shape when cooked with slightly less water and allowed to cool just enough before forming the rice balls.
- Secret Boost: A light sprinkle of salt on your hands seasons the outside while helping prevent the warm rice from sticking during shaping.
- Quality Tips: Rinse the rice thoroughly before cooking, use freshly cooked warm rice, and choose fresh nori sheets that stay crisp until serving.
Nutritional Benefits
Rice provides complex carbohydrates that give your body steady energy, making onigiri an excellent snack or lunch option. It’s filling without feeling overly heavy, especially when paired with lean protein or vegetables.
Seaweed is naturally rich in minerals like iodine and contains small amounts of vitamins and antioxidants. Adding fillings such as tuna, salmon, or vegetables also boosts the nutritional value by providing protein, healthy fats, and fiber.
Making onigiri at home lets you control the ingredients, sodium, and fillings, making it a healthier alternative to many packaged snacks or fast-food lunches.
Adaptable Variations
- Dietary Swaps: Use brown rice for extra fiber, quinoa-rice blends for added protein, or vegan fillings like avocado, mushrooms, or seasoned tofu.
- Flavor Twists: Add furikake seasoning, sesame seeds, chopped scallions, shredded cheese, spicy tuna, kimchi, or teriyaki chicken.
- Seasonal Spins: Fill with fresh cucumbers in summer, roasted sweet potatoes in autumn, sautéed mushrooms during winter, or fresh herbs in spring.
Cooking Science Explained
Japanese rice is naturally stickier because it contains more amylopectin starch. Regular white rice contains less, which means it won’t cling together quite as easily. Cooking it with slightly less water helps create a firmer texture that’s easier to shape.
Warm rice sticks together much better than cold rice. Shaping the rice while it’s comfortably warm allows the natural starches to hold the grains together more effectively.
Pressing the rice firmly—but not too tightly—helps the onigiri keep its shape while remaining soft and tender inside.
Easy, Step-by-Step Recipe
Ingredients
- 2 cups uncooked regular white rice
- 2¼ cups water
- 1 teaspoon salt
- 4 sheets nori (seaweed), cut into strips
- Optional Fillings:
- ½ cup tuna mixed with mayonnaise
- Cooked flaked salmon
- Teriyaki chicken
- Avocado slices
- Cooked shrimp
- Pickled vegetables
- Kimchi
- Cream cheese
- Optional Seasonings:
- Sesame seeds
- Furikake seasoning
- Soy sauce
Instructions
- Rinse the rice under cold water several times until the water runs mostly clear.
- Cook the rice using 2¼ cups of water until tender.
- Allow the rice to rest for about 10 minutes after cooking.
- While the rice is still warm, prepare your desired fillings.
- Wet your hands lightly with water.
- Sprinkle a little salt onto your palms.
- Place about ½ cup of warm rice into one hand.
- If using a filling, gently flatten the rice slightly.
- Add about one tablespoon of filling to the center.
- Cover the filling with another small amount of rice.
- Carefully press the rice together.
- Shape into a triangle, oval, or round ball using gentle pressure.
- Wrap one side with a strip of nori.
- Repeat with the remaining rice.
- Serve immediately or allow them to cool before packing for lunch.
Practical & Valuable Tips
- Storage: Wrap each onigiri individually in plastic wrap and refrigerate for up to 24 hours. For the best texture, enjoy them the same day.
- Serving Ideas: Pair with miso soup, cucumber salad, Japanese omelet (tamagoyaki), steamed edamame, or fresh fruit.
- Substitutions: If regular white rice doesn’t hold together well, mix in a small amount of sushi rice when available or add a teaspoon of rice vinegar for extra flavor.
Make-Ahead & Batch-Cooking
Onigiri is perfect for meal prep because you can prepare several rice balls at once and wrap them individually for grab-and-go lunches. Keep the nori separate until serving if you prefer it crispy.
You can also prepare different fillings ahead of time so everyone can build their own favorite combinations. This makes onigiri a fun activity for family lunches or picnics.
While freshly made onigiri always has the best texture, leftovers can be lightly reheated in the microwave for a few seconds before eating.
Eco-Friendly Kitchen Hacks
- Use leftover cooked rice instead of throwing it away.
- Turn leftover vegetables into delicious fillings.
- Store onigiri in reusable food containers.
- Use every sheet of nori by cutting scraps into soup toppings.
- Plan fillings using ingredients already in your refrigerator to reduce food waste.
Pairing Suggestions
- Beverages: Green tea, jasmine tea, barley tea, iced tea, sparkling water, or miso soup complement onigiri beautifully.
- Sides & Sauces: Pickled vegetables, cucumber salad, miso soup, steamed edamame, soy sauce, spicy mayo, or Japanese potato salad make wonderful companions.
Frequently Asked Questions
- Can I really use normal rice instead of Japanese rice?
Yes! While Japanese short-grain rice is stickier, regular white rice works well if it’s freshly cooked and shaped while still warm. - Why are my onigiri falling apart?
The rice may be too dry or too cool. Shape it while it’s still warm and press firmly without squeezing too hard. - Can I make onigiri ahead of time?
Yes. They’re perfect for lunch boxes and can be prepared several hours in advance. - What are the best fillings?
Tuna mayo, cooked salmon, teriyaki chicken, shrimp, avocado, seasoned tofu, and pickled vegetables are all delicious choices.
Call to Action
Making onigiri with normal rice proves that you don’t need specialty ingredients to enjoy one of Japan’s most beloved comfort foods. With a few simple techniques, you can create soft, flavorful rice balls that are perfect for lunches, snacks, picnics, or quick dinners. Once you make them yourself, you’ll discover just how fun and customizable homemade onigiri can be.
If you try this recipe, I’d love to know which filling became your favorite! Did you stick with classic tuna mayo, choose salmon, or create your own unique combination? Leave a comment below and share your homemade onigiri on social media. Happy cooking!
Bonus: Your Kitchen Notes
One of the best parts of making onigiri is experimenting with different fillings and seasonings. Maybe you found the perfect rice-to-water ratio, discovered a favorite spicy filling, or created a combination your family loves. Use this section to write down your favorite ideas, ingredient swaps, and shaping tips so every batch becomes even better.
The simplest recipes often become everyday favorites because they’re practical, affordable, and endlessly adaptable. Continue trying new fillings, toppings, and shapes until you’ve created your own signature homemade onigiri that everyone looks forward to enjoying.