
Personalized Introduction
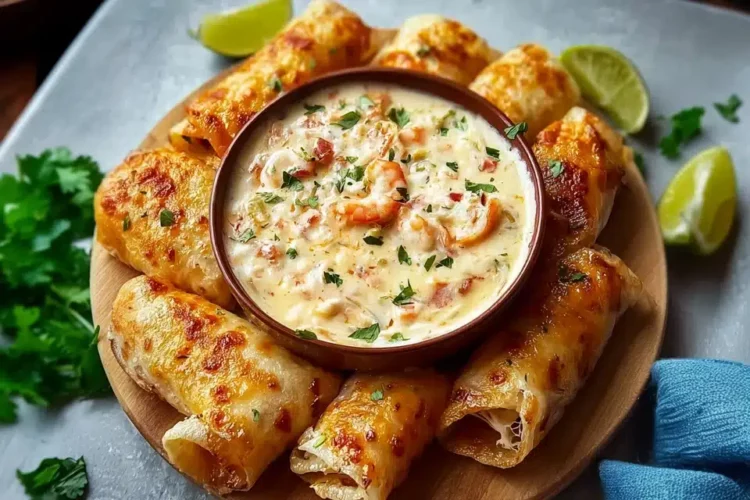
I don’t know about you, but grilled cheese has always felt like pure comfort to me. It’s one of those foods that instantly brings you back to simple, happy moments. Now imagine taking that classic grilled cheese and giving it a soft, slightly sweet twist. That’s exactly what happens with this Hawaiian Roll Grilled Cheese.
The first time I made this, it wasn’t planned at all. I had a pack of Hawaiian rolls sitting on the counter, a few slices of cheese in the fridge, and that familiar craving for something warm and melty. I sliced the rolls, stuffed them with cheese, brushed them with butter, and popped them on the stove. One bite later, I knew this wasn’t just another grilled cheese—it was something special.
These little sandwiches are soft on the inside, golden on the outside, and perfectly gooey in the middle. They’re great for lunch, game day, family dinners, or even a late-night snack. Let’s make them together and turn a simple moment into a cozy kitchen memory.
Recipe Origin & Story
Hawaiian rolls are known for their pillowy texture and gentle sweetness. They’ve been used in sliders for years, especially for parties and gatherings. At some point, someone had the brilliant idea to turn them into grilled cheese—and honestly, it was inevitable.
I discovered this version while experimenting with slider-style sandwiches. Regular bread felt too big and heavy, but the rolls were just right. When grilled, they crisp beautifully on the outside while staying soft and tender inside. Add cheese, and you get that perfect sweet-and-savory balance that makes you reach for another one without thinking.
Since then, Hawaiian Roll Grilled Cheese has become a favorite in my kitchen. It’s easy, nostalgic, and always a crowd-pleaser—especially with kids and anyone who loves comfort food with a twist.
Ingredient Spotlight
- Main Star: Hawaiian rolls. Their slight sweetness and soft texture are what make this grilled cheese different from the classic version.
- Secret Boost: The butter spread. A simple mix of melted butter and a pinch of garlic powder or salt makes the rolls crisp up beautifully.
- Quality Tips: Use good melting cheese. Cheddar, mozzarella, Colby Jack, or American all work well. Fresh rolls will give you the softest interior.
Nutritional Benefits
This recipe is definitely comfort food, but it still offers a few benefits. Cheese provides protein and calcium, helping support bones and muscles. The rolls give you carbohydrates for quick energy, which makes this a great option for kids or busy days.
You can also balance things out by serving these grilled cheese sliders with fresh fruit, soup, or a crisp salad on the side.
Adaptable Variations
- Dietary Swaps:
Use dairy-free cheese and plant-based butter for a dairy-free version. Choose gluten-free rolls if available. - Flavor Twists:
Add a slice of tomato, a sprinkle of everything bagel seasoning, or a bit of garlic butter. You can also mix cheeses for extra depth. - Seasonal Spins:
In colder months, add a layer of caramelized onions. In summer, serve them with fresh tomato soup or a light salad.
Cooking Science Explained
There’s a simple reason these turn out so good:
1. Butter creates the crunch.
As the butter melts, it helps the rolls toast evenly and turn golden.
2. Low to medium heat is key.
Cooking too fast will burn the outside before the cheese melts. Gentle heat gives you perfect gooey centers.
3. The rolls trap heat.
Their soft structure helps the cheese melt faster and more evenly.
Easy, Step-by-Step Recipe
Ingredients
- 12 Hawaiian rolls (kept connected or separated)
- 6–8 slices cheese (cheddar, mozzarella, American, or a mix)
- 3 tablespoons butter, melted
- Optional: garlic powder or salt for the butter
Instructions
- Slice the rolls horizontally, keeping tops and bottoms together.
- Place cheese evenly over the bottom half of the rolls.
- Close with the top half.
- Brush the outsides with melted butter.
- Cook on a skillet over medium-low heat until golden on both sides and cheese is melted.
- Rest briefly, slice, and serve warm.
Practical & Valuable Tips
- Storage:
Store leftovers in the fridge up to 2 days. Reheat in a skillet or air fryer. - Serving Ideas:
Serve with tomato soup, fries, or fresh fruit. - Substitutions:
Swap cheese types or add extras like bacon or ham if desired.
Make-Ahead & Batch-Cooking
You can assemble these ahead of time and store them in the fridge. Cook just before serving for the best texture. They’re perfect for parties and game days.
Eco-Friendly Kitchen Hacks
- Use leftover rolls before they go stale.
- Reheat using a skillet instead of the oven to save energy.
Pairing Suggestions
- Beverages:
Milk, iced tea, lemonade, or sparkling water. - Sides & Sauces:
Tomato soup, marinara, or honey mustard.
Frequently Asked Questions
- Can I bake these instead?
Yes, bake at 350°F (175°C) until golden and melted. - What cheese melts best?
Cheddar, American, mozzarella, and Colby Jack all melt well. - Can I make them for a crowd?
Absolutely. They’re perfect for serving multiple people. - Are these kid-friendly?
Very much so—kids love the sweet rolls and melted cheese.
Call to Action
Make these Hawaiian Roll Grilled Cheese the next time you want something simple, warm, and comforting. Serve them fresh and watch them disappear fast.
Bonus: Your Kitchen Notes
Use this space to write down your favorite cheese combo or any fun additions you try next time. This recipe is easy to personalize and even easier to love.